Lensbaby Sol 45 & OMNI Silver Reflection | ISO | 100 | 1/200 | Canon 5D Mark IV
Did you ever try to shoot with prisms or mirroring tools at home and struggled not to accidentally reflect things in your pictures you don't want to see in your photo? Sure, you can stop your home experiment and go outside using all your prisms there, but what if you can't shoot outside, for whatever reason. Let me help you using the new OMNI Reflection Wands in a small home studio, show you what great things you can use the Wands for, and at the same time give you some tips on how to overcome the usual problems that come up with using mirroring tools in small places, like a home studio.
Before you start:
Building up your Studio: Why doing this, what do you need, what did I use for my photos?
So why does the stress to yourself using mirrors in a small home studio at all?
Well, speaking for me at the moment, neither can I walk nor leave the house. Of course, giving up photography and not testing the new OMNI Reflection Wands is out of the option. So, I've built myself a small home studio.
But there are a lot more reasons for using a home studio for your shootings:
- You'll be flexible to shoot in every weather condition,
- if you're an outdoor-only photographer, you can use it to try new things in a quiet environment
- or overcome the time till you can go back to a bigger studio, etc.
1st: What do you need to build up a small home studio?
- Backdrops and/or fabrics you can build up behind your model
- Some extra opaque fabric or cardboards, preferably one in black and one in white (I'll explain why later) to cover things you don't want to reflect or quite the opposite: To build a neutral backdrop to reflect/mirror things into your photo with the new OMNI Reflection Wands.
- Light Sources: This can be a huge window used for natural light, or studio equipment like Ring Lights, LED lights, studio flashlights, or plug-on flashlights.
I only used studio lightning (Ring Lights, LEDs, (studio) flashlights) for my examples attached. The room where I've shot the photos is usually my workspace, where I edit my pictures and store some books. This room is just around 15 square meters, so not very much space at all.
And now let's get started:
The basics: What can you do with the Reflection Wands at home?
What you get with the OMNI Reflection Wand Set:
- 1 Mirror Wand, one side golden, one side silver
- 1 Transparent greyish Wand
Note:
Both Reflection Wands have two sides: One with a rounded shape and a sharp/straight side. Be aware that both sides can be used for different effects!
- Putting the round shape in front of your lens will reflect things into your photo, such as a person you photograph. It works like using a beamer without having a beamer.
- Putting the sharp/straight side in front of your lens is perfect for mirroring/doubling the person or object you want to photograph.
- You can use both sides on the left or right side of your lens and, of course, on the upper or lower side of your lens. With the help of your OMNI Basic Kit, you can adjust the Reflection Wands without using your hands in any direction very easily.
Examples:
1st) Start easy and double your model full body or for portraits or create more or less subtle reflections:
Like I just mentioned, for doubling your model – no matter if you are shooting full-body, portraits, flowers, or anything else, you've got to use the straight side of your Reflection Wand in front of the lens of your choice. You can use the Wand while holding it free in your hand or – more comfortable – with the OMNI Small or Large Ring and magnet adaptors.
Place the Reflection Wand of your choice and start moving it around while looking through your camera. You'll instantly see what your photo will look like, what you will reflect/double. Remember, you can double/reflect from left to right and upside / down or the other way around.
If you use the golden Wand, it'll turn your photos into a more warm, almost vintage-like look, while the silver Wand is neutral to cool. The Transparent Wand will be very subtle in the Studio and reflect some of the light sources (if you use LEDs or ring lights), or even create lens flares (if you use flashlights).
Doubling with the golden Reflection Wand from left to right, shot with the Lensbaby SOL45:
Lensbaby Sol 45 & OMNI Reflection Gold Wand | ISO | 100 | 1/200 | Canon 5D Mark IV
Doubling with the silver Reflection Wand from left to right, shot with Canon EF 24-70mm f2.8 II USM lens. Please note, this is the same model, and I've used the same blush-colored backdrop for both photos. You can see the more vintage/warm effect on the portrait and the more neutral to cool effect of each side of the Reflection Wand:
"You can see the more vintage/warm effect on the portrait and the more neutral to cool effect of each side of the Reflection Wand"
Lensbaby OMNI Silver Reflection | ISO | 100 | 1/200 | Canon 5D Mark IV
Doubling upside-down with the silver Reflection Wand:
Lensbaby OMNI Reflection Silver Wand | ISO | 100 | 1/200 | Canon 5D Mark IV
Getting spooky with letting your model meet her double with the (silver) Reflection Wand full body:
Lensbaby OMNI Reflection Silver Wand | ISO | 100 | 1/200 | Canon 5D Mark IV
2nd start combining effects by using the golden/silver Reflection Wand and adding the Transparent Wand:
Are you already getting warm with the first effects you can create with the OMNI Reflection wands? Then let's go one step further and add the Transparent Wand to the silver / golden one.
If you're an outdoor photographer, just let me mention that the Transparent Wand will create different looks when you use them outdoor. You can perfectly use the Transparent Wand to create lens flare effects or subtle reflections in the Studio.
1: Creating subtle reflections while using a permanent light source, like a ring light or LED lights:
Lensbaby OMNI Reflection Wand | ISO | 100 | 1/200 | Canon 5D Mark IV
Just like on the 1st portrait of this series, I've used the golden Reflection Wand to give the photo a soft, vintage, golden look. You almost don't see the usage of the golden Wand because I only placed it in the downright part of the photo, only reflecting the golden color of the Wand into the photo. The Reflection you see in the middle of the photo is created with the Transparent Wand.
2.: Creating lens flare effects while using flashlights and combining the silver and Transparent Wand:
I've placed three light sources for this photo: My key light is a studio light placed on the model's face. The 2nd light source is a studio light with a softbox on it, standing on the floor, lighting up her body and dress. My 3rd light source is just a small Speedlight with a turquoise color gel on it to get more color inside the photo. This Speedlight is placed right next to my model but in the background. The Speedlight is not placed on the model, but in my direction (so my Reflection Wands can catch up with this light color):
Lensbaby OMNI Reflection Wand Silver | ISO | 100 | 1/200 | Canon 5D Mark IV
Lensbaby Sweet 50 & OMNI Transparent Wand & OMNI Silver Wand | ISO | 100 | 1/200 | Canon 5D Mark IV
Both on the color and the black and white photo, you can see the doubling/reflection created with the sharp side of the (silver) Reflection Wand and the lens flare effect created with the Transparent Wand while using flashlights.
3rd: Get really crazy by using the round-shaped part of your Reflection Wands and start mirroring beautiful things into your model:
Up to here, you shouldn't have had any huge problems with reflecting things into your photos you don't want to see on your picture.
But it would be a pity only to use the sharp side of your Reflection Wands because the rounded side of your Wands gives you so many possibilities of creating surreal art, even if you shoot at home. For me, the round side of the Reflection Wand gives me the possibility to create Beamer-Photography-like effects without having a Beamer at home and in a more surreal way.
At the same time, this is the part where you will face two problems (at least I did): 1st: How do I avoid reflecting the wrong things into my photo? 2nd: How do I prepare my room/home studio to reflect exactly what I want to reflect into my picture?
1st: To avoid reflecting wrong things into your photo and to create a neutral backdrop where you can place the thing you want to reflect, start hanging up opaque fabrics or backdrops. Cover things you don't want to reflect completely. If you want to save money, use thick, non-reflective bed sheets – or buy fabric especially for this usage.
One thing is very important: If you want to start with this technique, try easy steps to avoid getting frustrated if it doesn't work out on your first try. For example:
- If you want to take a portrait of a model and you place this model in front of a black backdrop, then cover everything you don't want to reflect in your room with black fabric/backdrop, too. This gives you the same "base." Plus: Whatever you want to reflect on your model (in this case standing in front of a black backdrop) should be in a counter color or a bright color. For example: Start with a model in front of a black backdrop, cover everything you don't want to reflect and at the same time build a backdrop for the thing you want to reflect with a black backdrop, too and then place – for example – something white (or any other bright color) on your cover sheet.
- The same works the other way around: If you want to take a photo of a model in front of a white backdrop, use white fabric/backdrop for covering everything you don't want to reflect and for building a neutral base for something (black/dark) you want to reflect into your model/photo.
Just as a tip: You can use huge, printed flags for this, too! If you have a look around, you might find some very interesting fabric flags big enough and with already interesting stuff printed on them to use for your photography.
To make it more tangible, what I mean is I will show you a photo example I shot and then show you how I built up the Studio by just using cheap flags.
Here you see my husband, forced to stand in front of a black backdrop. I've used the same studio lighting as for the last photos: key light from the side, one light on the bottom right in front of him, and a small Speedlight, this time behind him to light up his hair a bit, with a turquoise gel light on it) while reflecting a moth/butterfly wing onto his face:
Lensbaby OMNI Silver Reflection Wand | ISO | 100 | 1/200 | Canon 5D Mark IV
And here, you can see "behind the scenes" how cheap and easy my really small home studio was build up to create this photo. Basically, I just reflected the moth flag into my model with the usage of the rounded silver side of the Reflection Wand:
4: Let your mind flow and create your own new ideas
I hope I could show you that you can get really creative with the new Reflection Wands at your own home, and I hope I could take away the "fear" of the difficulties with using mirrors (and other prisms) at home.
Please don't hesitate to contact me if you need more background information if you should get stuck trying something like this at home.
And I'll leave you with some more inspiration for creating things I didn't show you in this blog:
- Take idea number three and turn it the other side around: Take a picture of an object, for example, dried flowers, a chair, anything like that and place your model on the side, reflecting it in your photo! This will give you the chance to create ghost-like images. Imagine taking a photo of a beautiful old chair and reflecting someone sitting or standing on the backside of your room into it. You can create old vintage ghost images this way! If anyone should do this, I'd be happy if you could show your results to me. I already tried it, and it works out great. I'm really curious about what you will create.
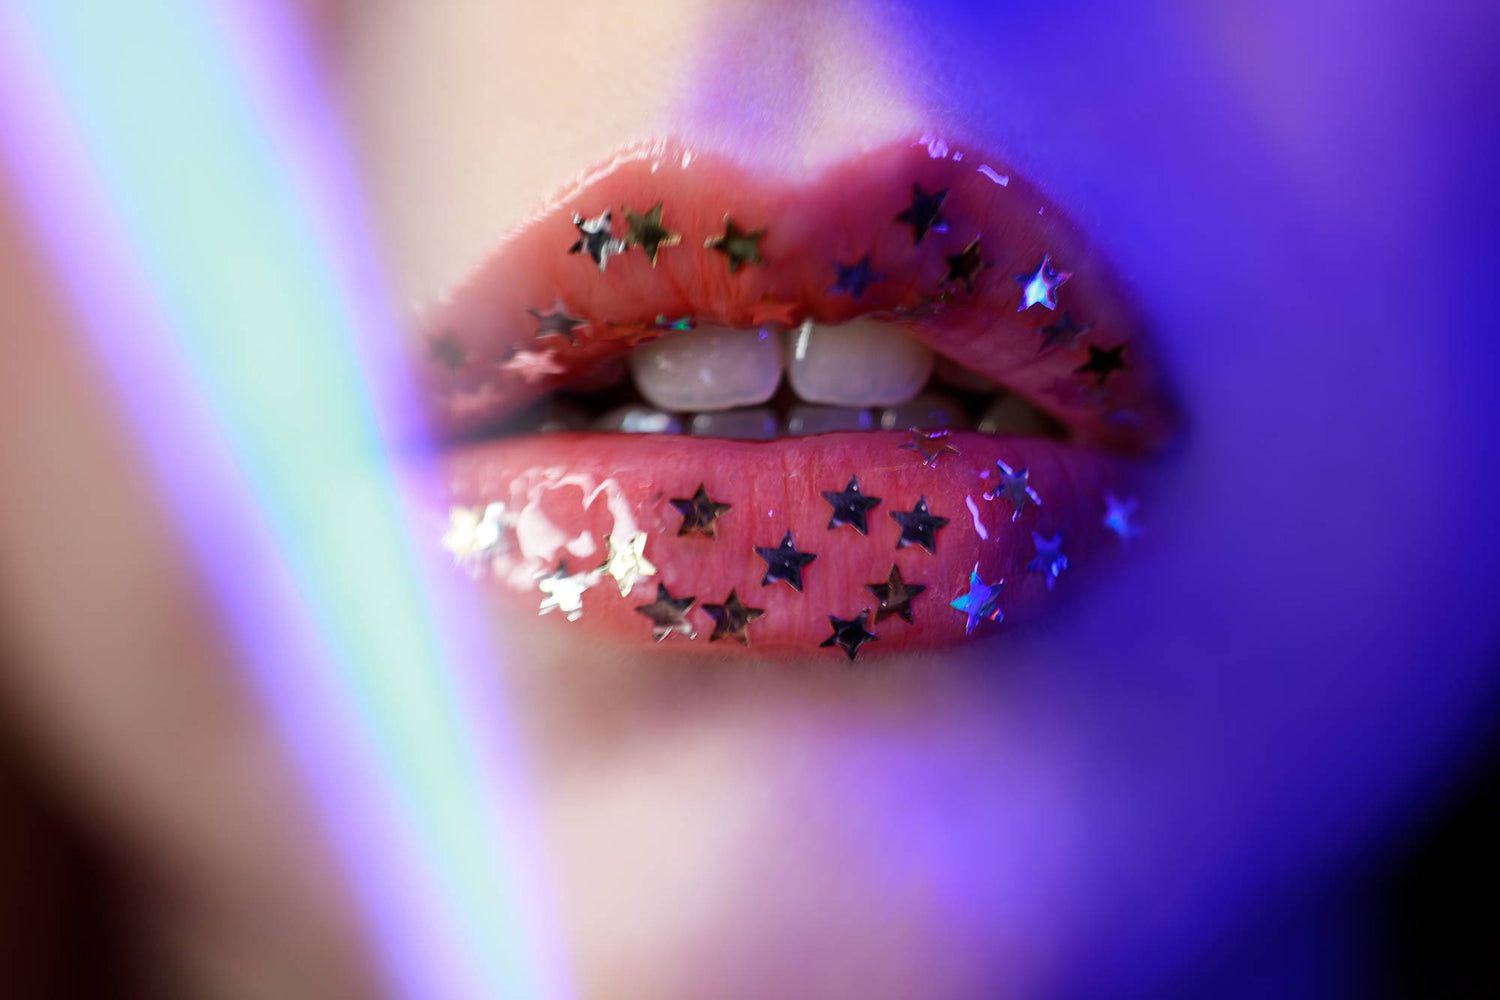
- Use the Reflection Wands for macro portrait photography and create stunning results of your model's beautiful eyes, lips, or other beautiful body parts.
Lensbaby Sol 45 & OMNI Silver Reflection | ISO | 100 | 1/200 | Canon 5D Mark IV
Want your shots featured by Lensbaby?
Be bold and shoot extraordinary! Make sure to tag your photos on IG with #Lensbaby, #ShootExtraordinary, and let us know what gear you’re using. 📸
Simone Gernhardt
Simone is a photographer and MakeUp Artist from Germany, who specializes in portrait, fashion, beauty and experimental photography. She began photographing 16 years ago and has used experimental tools and prisms from the beginning.
Her main focus is to create pictures of how she sees the world and people around her, in her own way. She discovered Lensbaby 13 years ago, what finally gave her the chance to create this kind of pictures and uses Lensbaby lenses, optics, and the OMNI System for every shooting.
Instagram TikTok Website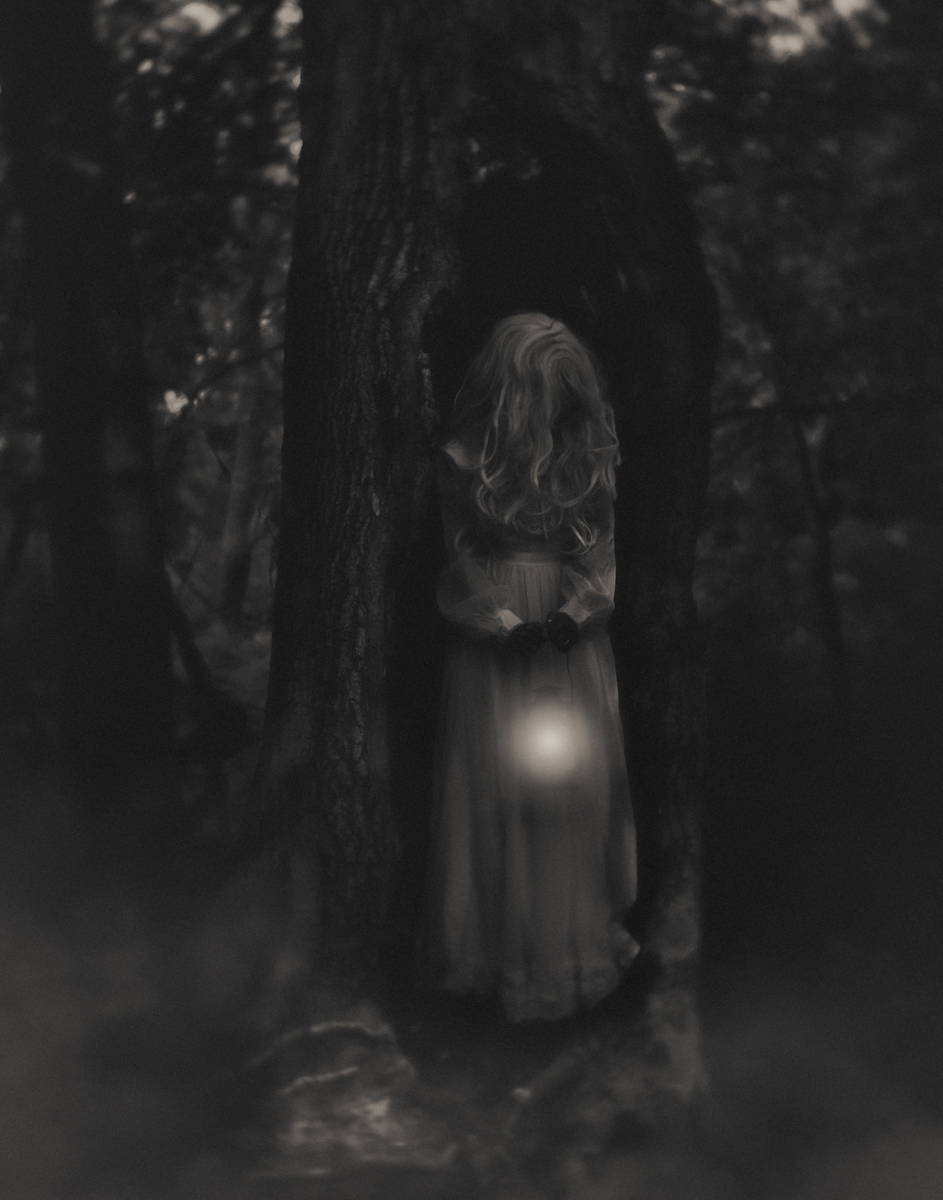
Leave a comment
All comments are moderated before being published.
This site is protected by hCaptcha and the hCaptcha Privacy Policy and Terms of Service apply.