Have you ever done portrait photography in the most beautiful oceanside location near Los Angeles?
For the last seven years, I have lived on the Palos Verdes Peninsula, an underrated and extremely scenic area 30 minutes South of Los Angeles. No matter if you live in L.A. or are here for a brief vacation, don't miss coming out to see it. Our quiet neighborhoods offer many trails, restaurants, and shopping areas. But most importantly, it is an amazing location for photography.
Photography heaven for professional and amateur photographers:
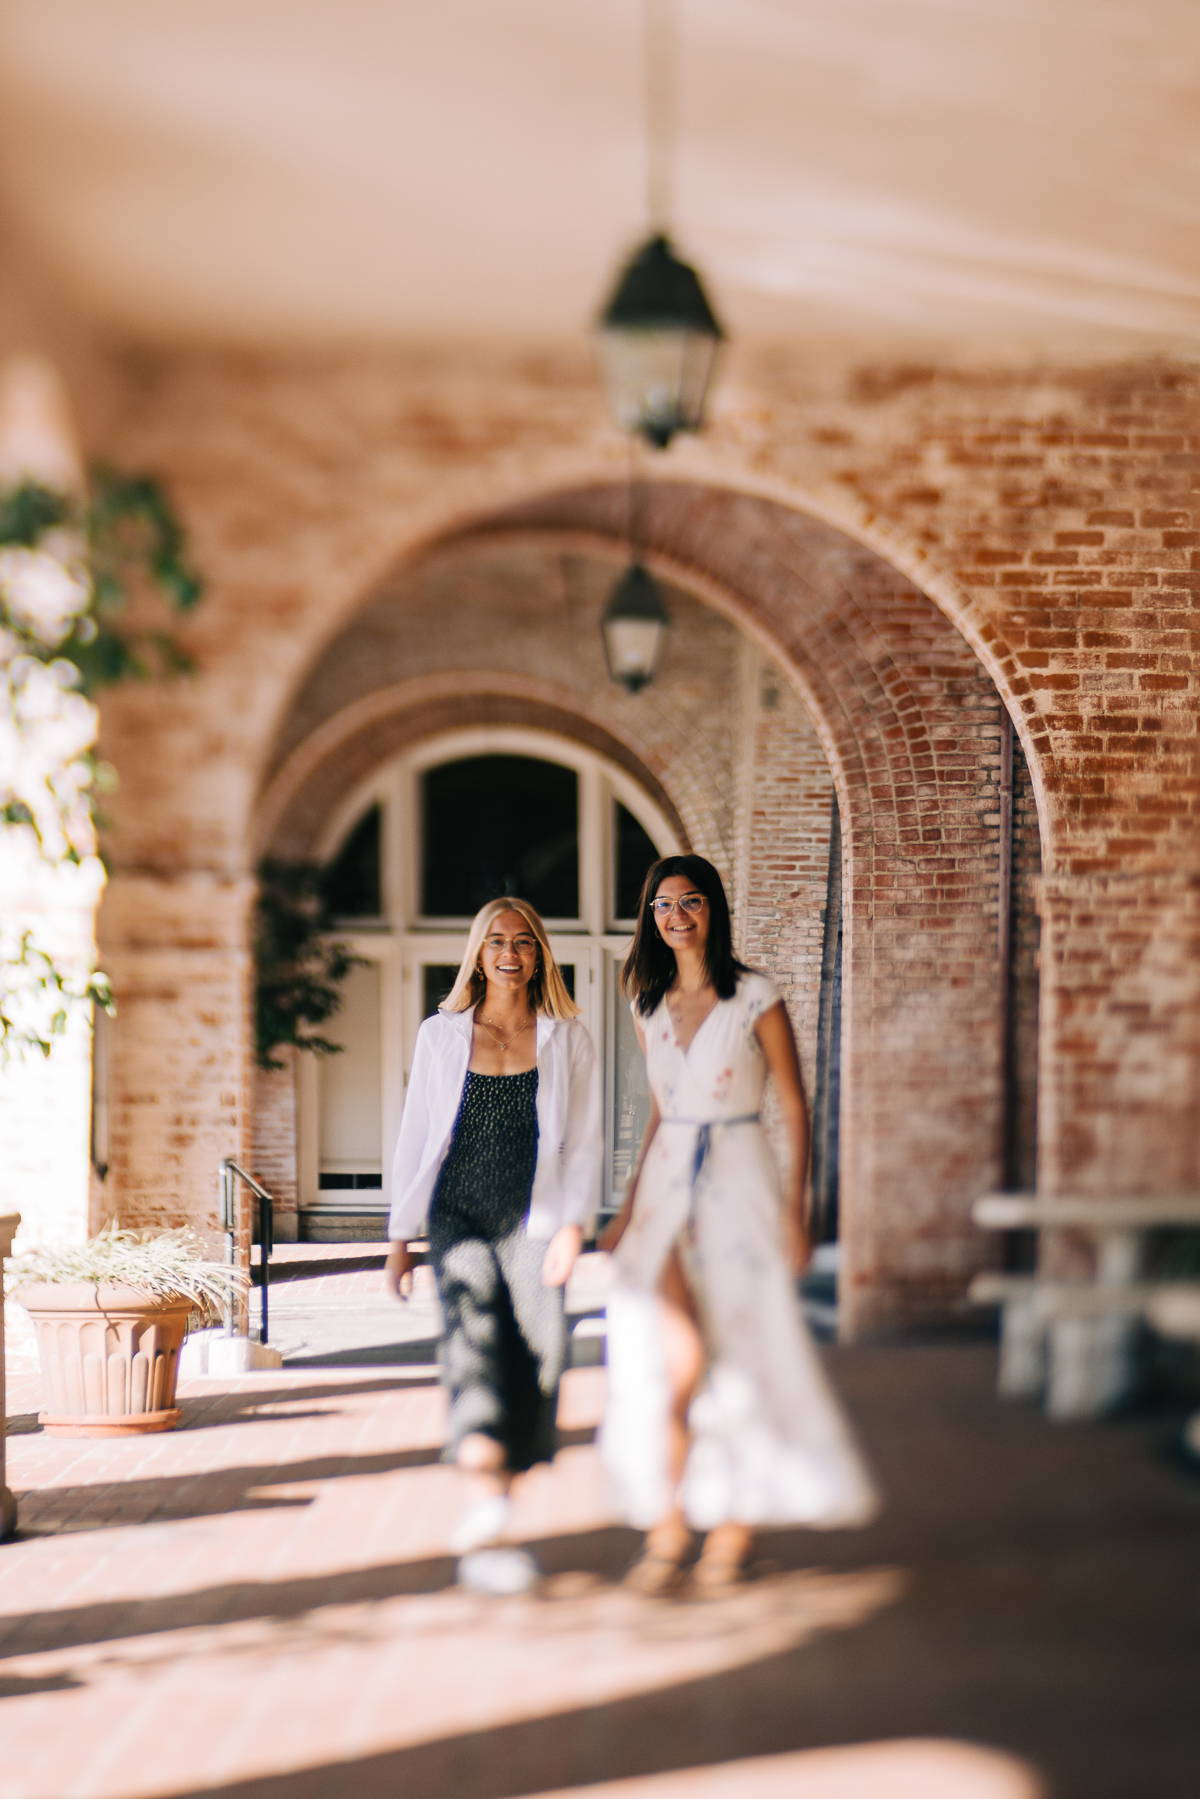
Landscape and portrait photographers will find plenty of subjects: our cliffs, trails, and parks offer many backdrops. Last month I met up with fellow photographer Jefferson Graham, and we toured my beautiful hometown together. While Jeff worked with his iPhone, I invited my daughter and her friend to take their portraits with my Canon R5 and my Lensbaby Spark lens. This lens, in combination with the Edge 80 optic, creates a very special look that is both dreamy and draws the focus to the subject, making it ideal for portraits.
Basic things to consider when taking portraits:
1. Lens and camera choice
One of the questions I often hear when talking about portraits is, "Which lens is the right lens?" The answer to this question varies:
It all depends on the way you want to portray your subject:
• For an intimate portrait, I would recommend using a longer focal length, ranging from 50 to 200 mm. I personally love the 85 mm focal length that I've used for the pictures in this article.
• For an environmental portrait, on the other hand, a wider angle, like a 35 mm lens or even wider, will be a better choice when you want to shoot from down below, for example, and get an interesting and unusual perspective.
The same is true for cameras. Any camera can create a great portrait. A good image is about your vision and how you see your subject. Only have your phone camera with you and want to take your bestie's picture? Switch your camera to portrait mode and play with the different modes; you will be amazed by the wide variety of options. Phone cameras are also great for scouting a location before the big photo shoot. Use phone pictures to study the light to be ready when you come back with your bigger camera.
2. Impact of Light
Amateur photographers tend to pose their subjects in bright sunlight. With the sun behind the photographer, the faces seem to get enough light, many beginner photographers think. However, the opposite is true. When the sun hits your subject's eyes, people tend to squint and have large, unattractive shadows under their eyes. Pose your subject in an open shade (a shaded area that faces into the light) instead and look at how flattering even tones make skin tones look.
3. Time of Day
If you have a choice, wait for the golden hour before shooting portraits. The warm light is flattering for any portrait. The lower the sun is to the horizon, the easier it is to shoot against the sun. If you have to shoot outdoor portraits around noon, shoot in the shade or try to hide the sun behind a building or tree. Harsh light rarely creates beautiful portraits.
4. Interact with your subject
Instead of saying "Cheese!" try to have a real conversation with your subject. Making the person in front of the camera as comfortable as possible is your best way to successful portrait photography. Once your subject engages with you, they will forget about the camera and show genuine emotions in their expressions. Continuing to shoot, even when you say you're done, is another good way to get honest expressions because the subject is no longer posing for the camera.
"For an intimate portrait, I would recommend using a longer focal length, ranging from 50 to 200 mm. I personally love the 85 mm focal length that I've used for the pictures in this article. "
5. Get a variety of poses
No one wants to see 50 images with the same pose and location. Let your subject walk, skip, dance, or bring props to help them loosen up. Keep shooting while your subject is playing instead of posing them stiffly. The more poses you can get, your pictures will be more interesting.
6. Cover the whole body to close up
Lastly, make sure you continue portraying your subject from different angles. I typically start with whole-body images and then get closer. A shoot list can be a helpful tool to remember to cover everything from the whole body to close-ups.
Want your shots featured by Lensbaby?
Be bold and shoot extraordinary! Make sure to tag your photos on IG with #Lensbaby, #ShootExtraordinary, and let us know what gear you’re using. 📸
Ute Reckhorn
Jan is a Canadian photographer, originally from Scotland. She lives on a farm in beautiful Haldimand County, Ontario near the shores of Lake Erie. The places she has lived and the people in her life, have inspired her to follow her dreams and pursue her love of photography.
Leave a comment
All comments are moderated before being published.
This site is protected by hCaptcha and the hCaptcha Privacy Policy and Terms of Service apply.