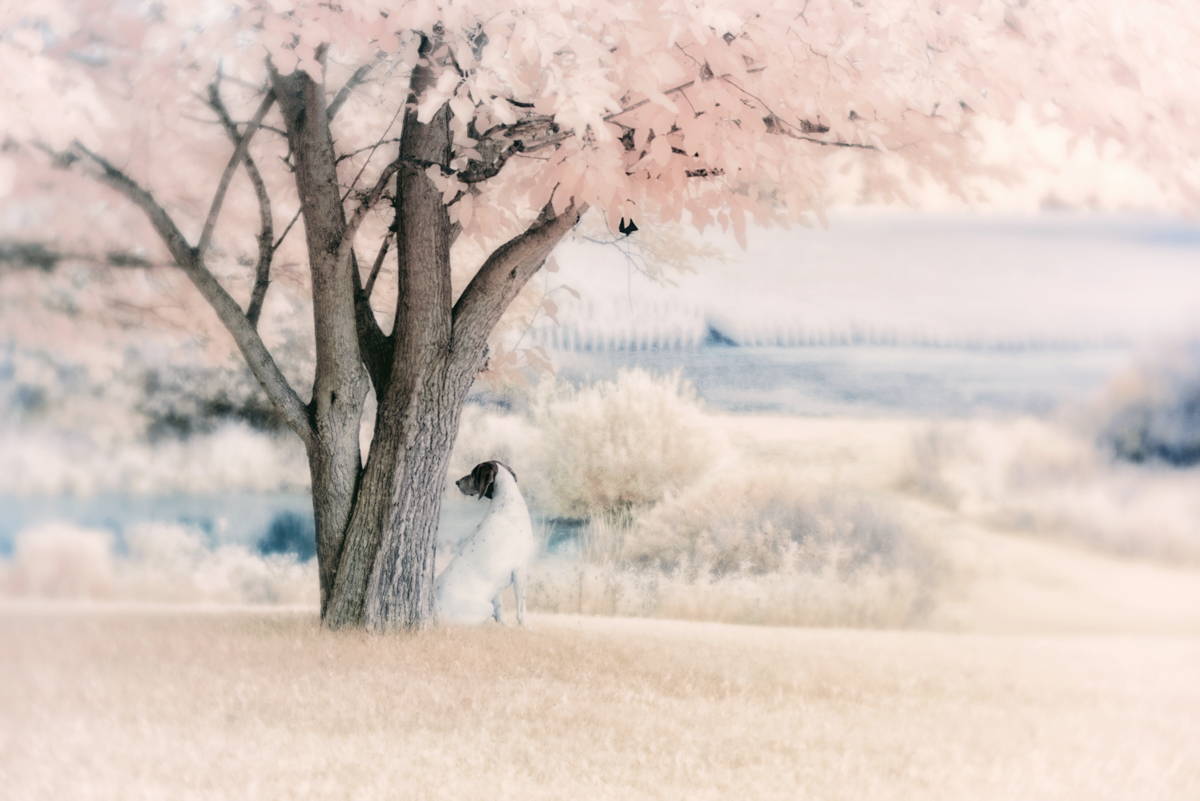
What kind of photos do you envision when you hear "Infrared photography"? I think of trees with beautiful white foliage in a lovely landscape scene. I'm guessing most people have a similar vision when they think of infrared photos, but infrared can be so much more, and with some experimenting, it can take you to a place you've never been.
Traditional photography uses visible light, but infrared light is invisible to the human eye; this is part of the intrigue of infrared.
Most photographers try to avoid harsh sunlight in photography, and one of the things I love about infrared is that sunlight enhances infrared light. I find a new freedom in taking photos at what would normally be considered the worst time of day.
Filters vs. Converted Camera
There are two methods for producing infrared photos: you can use a filter that attaches to your lens or a converted camera. Using a filter requires a tripod and long exposure times. Exposure times are normal with a converted camera, but a converted camera is much more of an investment than a filter. For me, the decision was simple because I didn't want to carry a tripod or fiddle with filters. I tend to be a bit of an impatient photographer, so I decided to use a converted camera and decided upon a 590nm conversion.
Nanometer Values
The nanometer value determines how much visible light reaches the sensor. The higher the nanometer value, the less visible light and, therefore, less colour variation. Some common nanometer values in I.R. photography are 590nm, 720nm, and 850nm. 590nm allows for false colour photos due to the amount of visible light that can enter the sensor. False colours can be quite vivid, depending on the editing choices. By contrast, 850nm allows very little visible light to enter and is excellent for monochrome images.
A full spectrum conversion allows the photographer to use multiple nanometers by attaching different filters. There is also a filter that allows you to take regular photos. If you decide to convert to anything other than full spectrum, you lose the ability to take regular photos, and your camera will now be dedicated to infrared photography. There's much more flexibility with a full spectrum conversion. I considered this option but knew I would be less likely to use my camera if I had to screw on filters and step rings every time I switched to a lens with a different diameter.
Colour Spectrum
When I first started taking infrared photos, I was surprised at the limited colour spectrum compared to traditional photography. Despite looking at hundreds of infrared photos, I hadn't considered this limited colour spectrum and how it would change my editing process. In traditional photography, the colour spectrum is very large and varied, but this isn't the case with infrared. With my 590nm conversion, images straight from the camera are cyan and red. They don't look very pleasing to the eye.
A quick word on editing
One aspect of the infrared journey I hadn't anticipated was the challenge of editing. Editing an infrared photo is quite different and poses some unique challenges. The S.O.O.C. images can look horrible. It took me some time to figure out how to create something visually pleasing. My editing workflow for I.R. is completely different than the process I use for traditional images.
Setting the correct white balance is very important when it comes to I.R. I shoot in R.A.W. and have two white balance presets in my camera, one for sun and one for shade. I don't worry too much about getting things right on camera because I will most likely adjust my white balance during post-processing. I find setting white balance in post-processing the best method because I can sample different areas in the image until I get the contrast I want to see. White balance in I.R. is more about contrast than colours. You will see the image pop when the white balance is set correctly. If you're an Adobe Lightroom user, you can create special profiles to utilize the infrared spectrum, the supplied profiles won't give you what you need, but even with custom I.R. profiles, I find that a red tinge remains. If I don't want to embrace the red, I use my native Nikon software to set the white balance because the native software utilizes every piece of R.A.W. data and gives me the results I'm looking for.
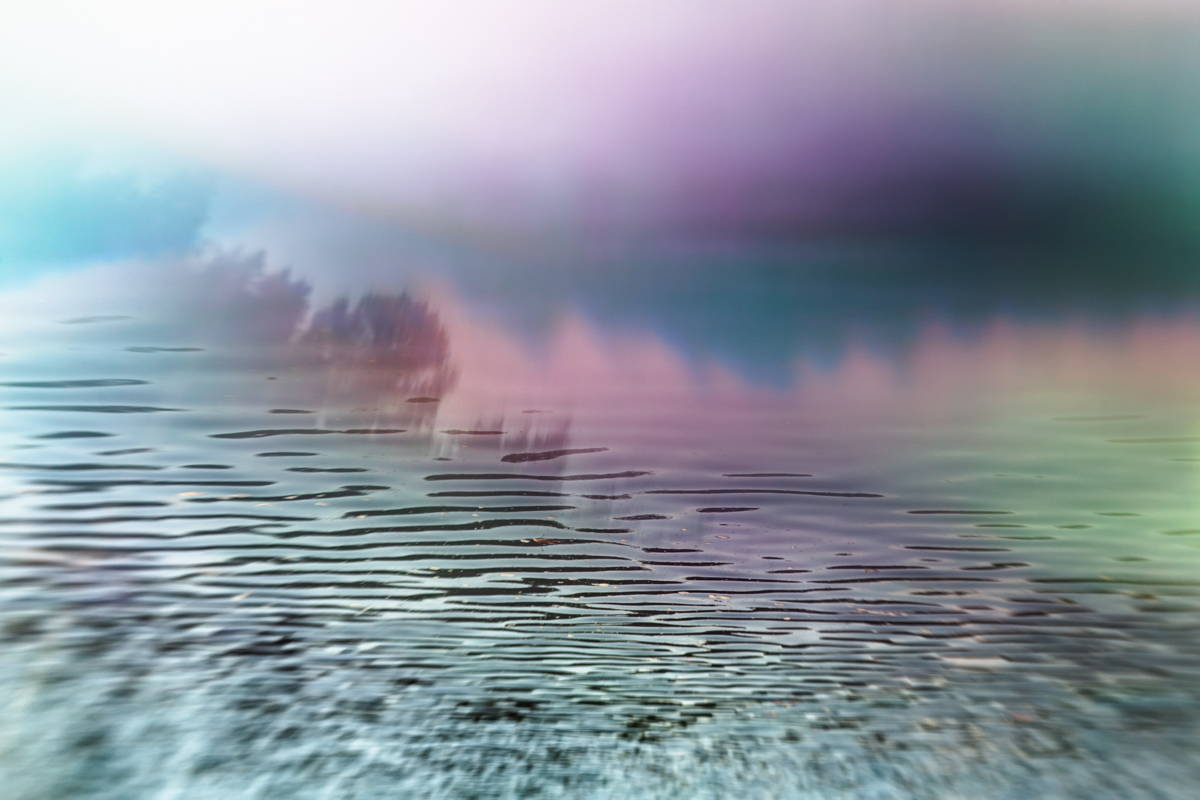
We've all seen a range of colours in infrared images. They range from monochrome to some quite bright and sometimes garish colours. There's no right or wrong way to use colour in infrared because we cannot see infrared light. It's up to the photographer to create a colour palette that fulfills their vision. These colour variations require the use of post-processing software. They aren't produced straight from the camera. I normally prefer more subtle colours and rarely use strong colours.
Channel swapping is a common technique to create different colours in infrared photos. If you venture into the world of I.R., you'll no doubt learn about channel swapping along the way.
"When I first started taking infrared photos, I was surprised at the limited colour spectrum compared to traditional photography."
Which lenses work best with infrared?
Some lenses produce hot spots in I.R. photos. This isn't a desirable look, so it's worthwhile to investigate your lenses to see if they'll produce hotspots.
I love using my Lensbabies for infrared, especially the Velvets and Soft Focus II. The beautiful glow produced by these lenses enhances infrared images. Glow is one of the things that makes an infrared photo look magical, so shooting with Lensbabies is a match made in heaven.
Feel f
Want your shots featured by Lensbaby?
Be bold and shoot extraordinary! Make sure to tag your photos on IG with #Lensbaby, #ShootExtraordinary, and let us know what gear you’re using. 📸
Jan Heastont
Jan is a Canadian photographer, originally from Scotland. She lives on a farm in beautiful Haldimand County, Ontario near the shores of Lake Erie. The places she has lived and the people in her life, have inspired her to follow her dreams and pursue her love of photography.
Leave a comment
All comments are moderated before being published.
This site is protected by hCaptcha and the hCaptcha Privacy Policy and Terms of Service apply.