
Lensbaby Velvet 28 & OMNI Gold Mirror | ISO | 100 | 1/640 | Nikon D750
Spark your Creativity by “Shooting Through”
The technique of “shooting through” can be used in a number of ways to add a selective area of blur, flare, or color surrounding your subject. This technique uses an object very close between the front of your lens and your subject. The object could be something obvious like foreground foliage in a busy flower patch to reach a particular flower beyond that point: this will blur the foreground foliage and isolate, frame, or draw attention to that flower. But we can also use objects placed intentionally in front of our lenses, such as crystals or shaped pieces of glass.
Using the New Omni Mirrored Wands
Lensbaby created the Omni system to use crystals, film gels, and patterned glass in front of your lens.
You can either hand hold the wand or use their magnetic ring attached to the front of your lens, which will grab the objects and hold them in place for hands-free assistance. With the magnetic ring holder, you have the option to also add more than one crystal or film gel. Adding to that line-up are now two wands with a mirrored surface to give you the ability to create mirrored reflections within your images. One wand is two-sided, with a gold mirror on one side and a silver mirror on the flip side. The other wand has a smoky translucent look that will give a more subtle reflection that blends in a less obvious way with your subject.
Note the floral images below and above and how the warm colors from the gold side of the mirror wand’s reflections are used to also change the actual tone and color of the flower. The silver mirrored side of the wand imparts a more neutral reflection in the second image, with a feel of soft rippled water reflecting the flower.
Lensbaby Velvet 28 & OMNI Silver Mirror | ISO | 100 | 1/250 | Nikon D750
Tips for shooting with the Omni Mirrored Wands
Generally, I found it best to shoot with a lens that has an aperture of at least f/2.8 or wider.
Shooting wide open lets the mirrored reflections blend in a more seamless way, especially up close to the subject. The idea is to hold the edge of the wand close to the edge of the lens and play with the position of the reflective glass, using a slight angle until you see your surroundings or the object itself reflected into your image.
Shooting at an angle facing the light or directional light can also make a difference with additional effects like flares or rainbow colors across your image.
In the image below, the sun was setting, and I placed myself in such a way to catch the sun between branches of the distant trees, using the gold mirror to reflect part of the scene at the bottom of the frame. In the second image, the architectural structures in the bridge were reflected into part of the water, and the mirror gave me the ability to carry the reflections and trees across the shoreline below.
Lensbaby Helios 44-2 Lens & Omni Gold Mirror | ISO | 100 | 1/2000 | Nikon D750
Lensbaby Velvet 28 & Omni Gold Mirror | ISO | 100 | 1/2000 | Nikon D750
Experiment to see What Works – Be Prepared for Some Surprising Results.
When I first experimented with the mirrors, I was using them specifically, mostly near the bottom edge of my lens, slightly tilted up to reflect my subject. If my subject filled the frame, then those were the reflections I saw below my subject. Then I began to experiment more and place the wand in a vertical position to the side of my lens, tilting it slightly inward or outward to see what would happen. It was in that position that the image below appeared in my viewfinder. I was shooting a patch of flowers facing the afternoon sun, and the large oak tree behind me was reflected in a way that appeared to be in shadow at an angle in front of my scene. This prompted me to experiment even more by placing the wand in different areas and angles near my lens edges to see what would happen.
Lensbaby Helios 44-2 lens & Omni Gold Mirror | ISO | 100 | 1/2500 | Nikon D750
In this image, I placed the gold mirror on the right side of the lens to reflect into the space on the right of the subject. Shooting with the Lensbaby Creative Bokeh Optic and a 12mm extension tube let me fill the frame with the flowers and reflections.
Lensbaby Creative Bokeh Optic w/12mm ext. Tube, Omni Gold Mirror | ISO | 160 | 1/320 | Nikon D750
"Don’t be afraid to shoot in strong directional light for clear reflections and flare effects."
Try New Subjects for Unexpected Results
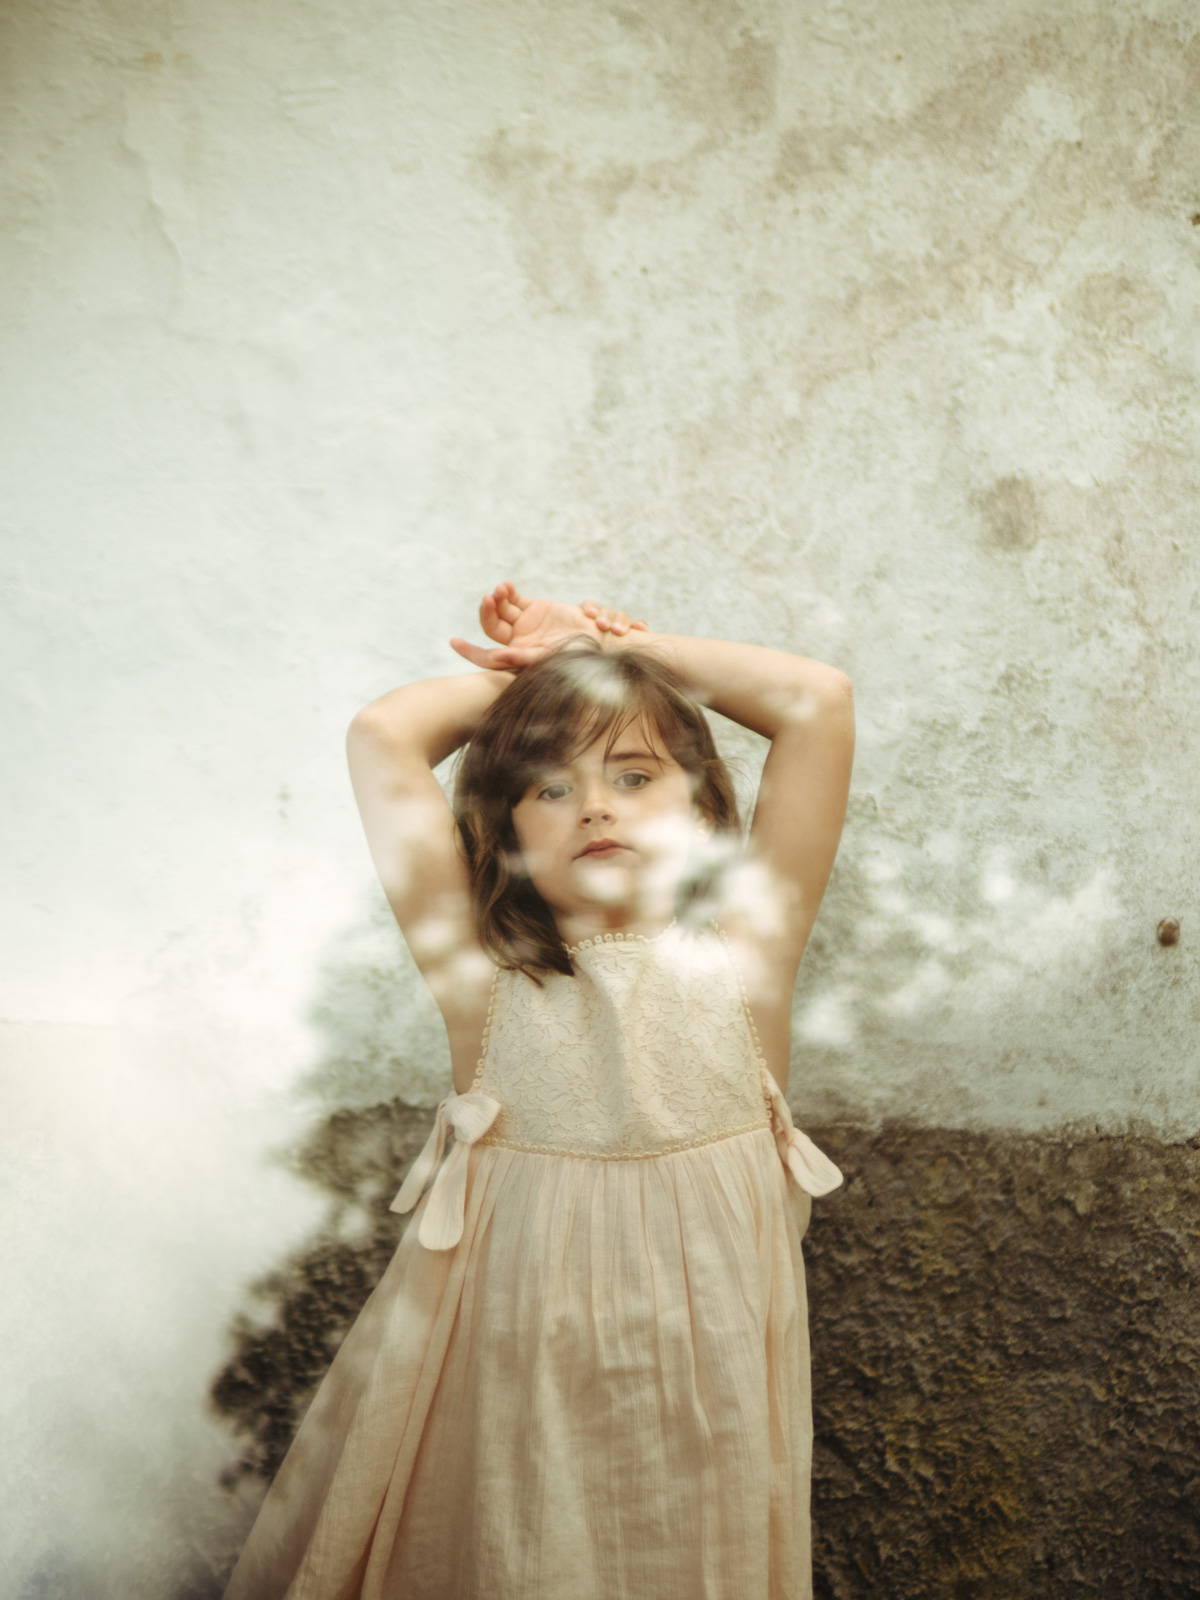
Trying the mirror wand on a portrait was the biggest surprise. I wanted to see if I could reflect parts of my subject’s face within itself or use nearby foliage from trees for a unique headshot.
Lensbaby Velvet 56, Omni Gold Mirror | ISO | 250 | 1/320 | Nikon D750
Lensbaby Velvet 56, Omni Gold Mirror | ISO | 250 | 1/200 | Nikon D750
Using the mirrored wand on architecture gave a surreal feeling to this scene by reflecting clouds into the building and adding an upside-down section of the structure within itself. This was done with the silver mirror held perpendicular to the bottom rim of my lens slightly tilted up to reflect the clouds.
Lensbaby Velvet 28, Omni Silver Mirror | ISO | 100 | 1/1000 | Nikon D750
If you prefer a less obvious reflection in your image, the clear smoky glass wand will give you a more translucent look and feel by blending parts of your image in a more subtle way. Here I used that wand in a busier floral background to add a slight reflection of the main subject into the foliage on the right. Converting the image to Black and White gave me a look I liked.
Lensbaby Creative Bokeh Optic w/12mm ext. Tube & Omni Smoky Glass | ISO | 160 | 1/125 | Nikon D750
My Closing Thoughts
Shooting these types of images can be a great deal of fun but also require a lot of experimentation. Try shooting several frames of your subjects because even slight adjustments in the wand placement and angle can yield a totally different result. Try different lenses and focal lengths – in general, I loved my Lensbaby Optics and Lenses because their special effects blend well with additional creative tools like Omni – but other lenses can give you beautiful reflections to play and experiment with. Don’t be afraid to shoot in strong directional light for clear reflections and flare effects.
Be prepared to play a lot! Once you get started, you may begin to pre-visualize what types of subjects might reveal some really cool effects. Perhaps this may stretch your creativity in ways you had not imagined!
Want your shots featured by Lensbaby?
Be bold and shoot extraordinary! Make sure to tag your photos on IG with #Lensbaby, #ShootExtraordinary, and let us know what gear you’re using. 📸
Gerri Jones
Gerri enjoys photographing all subjects and especially the challenge of new ways to see through the creative use of Lensbaby lenses. She is a Lensbaby Ambassador.
Gerri has been a featured speaker/instructor at regional camera conferences.
Gerri’s images have been featured in several publications, commercial proposals, and she also has reviewed several photography books for development by Focal Press Publications.
Her images have received several first-place awards in national and regional photo competitions.
Gerri resides in Buffalo, New York.

Leave a comment
All comments are moderated before being published.
This site is protected by hCaptcha and the hCaptcha Privacy Policy and Terms of Service apply.